With the growth of functionality across the different Office 365 workloads, it is becoming increasingly difficult for organizations to keep up with changes, enforce configurations across multiple tenants, or even stick to the “best practices”. Over the past few months, Microsoft has launched several initiatives that can help with such scenarios, like the Microsoft 365 DSC initiative, the Office 365 ATP Recommended Configuration Analyzer (ORCA) tool, and more recently, few preset security policies for EOP and Office 365 ATP. In this article, we will take the latter for a quick spin.
As the name suggests, the preset security policies represent a template of sorts, configured to match Microsoft’s recommendations. Currently, two presets are available, namely Standard protection and Strict protection. One can also think of them as “baseline policies”. As such, they are not configurable, as in you cannot customize them, even if some minor change is needed. The only thing you can modify is the set of recipients to which a given preset will apply, and in turn the set of individual policies. Speaking of which, the policies included in each preset are:
- Anti-spam policy
- Anti-malware policy
- Anti-phishing policy (either EOP or ATP one, depending on the subscription you have)
- ATP Safe link policy
- ATP Safe attachments policy
Note that the anti-spam policy is a single entry representing settings across the content and connection filter policies.
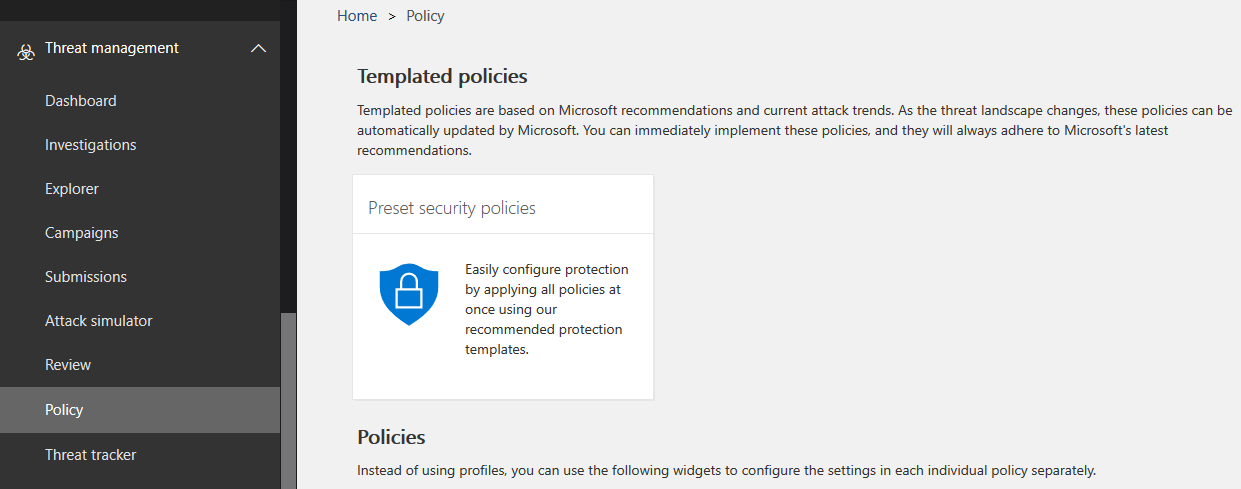
Now that we know what preset policies are, how do we go about assigning those, and more importantly, seeing what exactly they do? Both the old Security and Compliance Center and new (and still almost useless) Microsoft 365 Security Center expose the preset policies functionality. In the SCC, you can find them under Threat protection > Policy > Preset security policies, or using the https://protection.office.com/presetSecurityPolicies direct link. In the mess that is the Security Center, you need to first go to the Policies entry on the left nav menu, then click any entry under the Threat protection section, for example Anti-spam, then once the corresponding settings load up in a new tab, hit the Threat policies entry on top, and here you will finally find Preset security policies. Or you can just use the direct link: https://security.microsoft.com/presetSecurityPolicies.
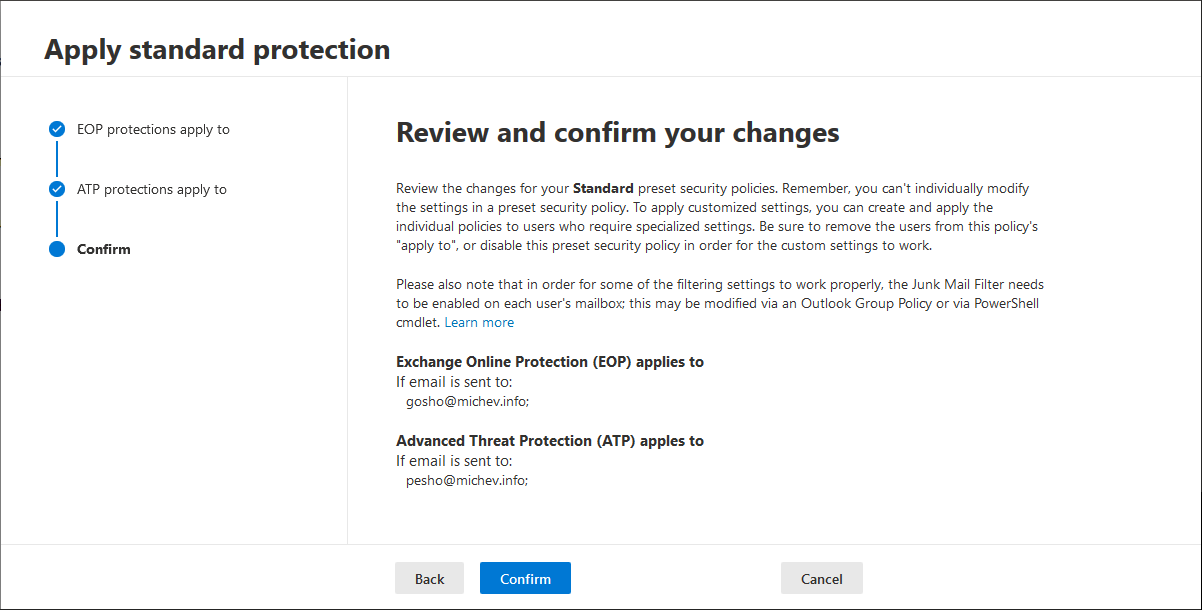
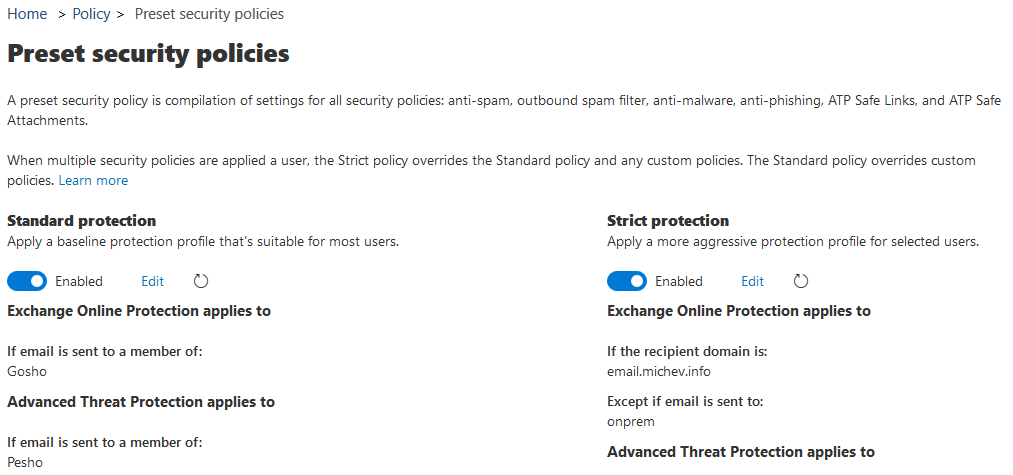
Under the Preset security policies page, you will find a short description of the feature, along with a link to the documentation. The rest of the page is taken by the list of currently assigned policies, split between the two policy types (Standard on the left and Strict on the right). To create a new assignment for a given policy, one can use the Edit button under the corresponding policy. Hitting the button will bring forth a new-style wizard-type interface with just three sections, as showcased below. All that you need to (or can) configure here is the list of users to which the policy will apply to, by selecting one of the conditions or exceptions you’re probably familiar with from assigning other types of EOP/ATP policies. Those are split between the EOP protections apply to and ATP protections apply to pages, while the last page gives you a quick summary.
As shown on the screenshots, you can target the different sets of policies to different groups of users. You can also configure multiple preset policies (as in both the Standard and the Strict one) to apply to the same set of users, either intentionally or by mistake. When multiple presets are applied to the same user, the Strict preset has the highest precedence, followed by the Standard preset, custom configured policies and lastly, the default policies.
The other controls exposed in the UI include the Enabled/Disabled toggle, which as the name suggest serves to quickly toggle the preset policies on or off. Lastly, a Refresh button is presented, as in some cases the UI doesn’t immediately list all newly configured conditions/exceptions to which a given preset applies. Hitting said button or refreshing the page should take care of that though.
Nowhere in the UI can you actually see which individual policy settings are changed by the presets you assigned above. To get this information, you’ll have to review the Recommended settings for EOP and Office 365 ATP security article, which presents you with a breakdown of each individual setting, along with its corresponding values when using the Standard or Strict policy presets. As to verifying whether the policy settings have been applied successfully to the (groups of) users in question, Microsoft recommends checking the end result. That is, check where a message marked as spam ends up, and same for bulk messages. This might sound fishy at first, but a quick look at the “recommended settings” article linked above reveals that the two presets differ in only a handful of settings, with the SpamAction and BulkAction in particular being the easiest one to check against. Other than that, the most noticeable difference is in the Outbound spam setting values, however those might not yet apply according to a recent comment over at GitHub.
Lastly, you can manage the preset policies assignment via the set of *-ATPProtectionPolicyRule PowerShell cmdlets:
- Disable-ATPProtectionPolicyRule
- Enable-ATPProtectionPolicyRule
- Get-ATPProtectionPolicyRule
- New-ATPProtectionPolicyRule
- Remove-ATPProtectionPolicyRule
- Set-ATPProtectionPolicyRule
That concludes our short overview of the recently introduced Preset security policies for Exchange Online Protection. I’ll make sure to update the article as additional presets are released or their functionality is expanded to cover additional settings.


