Now that we finally have support for automating Exchange Online PowerShell tasks in a manner compatible with modern authentication, organizations can start reworking their script to take advantage of the new capabilities. This also brings good news for ISVs that develop solutions which rely on ExO Remote PowerShell, as with the ongoing effort to disable basic authentication across the board, it was hard to explain to customers why they had to add exceptions to their conditional access policies or whitelist certain IPs in order to run say a third-party reporting solution.
In this short article, we will cover how to enable multi-tenant support for Exchange Online Remote PowerShell while using the new certificate-based authentication method. The same steps will apply to using the less secure client secret method. You should already be familiar with the generic steps to enable the process, as detailed in the official documentation or this article.
Assuming you’ve already created the required Azure AD application, the first important step is to make sure the application is configured as multi-tenant one, which you can do by selecting the corresponding option under Supported account types in the Azure AD blade. Do make sure that the application also has at least one redirect URI of the “web” type (under Platform configuration, hit Add platform, Web).
The next step is to add the application to another tenant, for example by having the customer click on an URL like the below one:
https://login.windows.net/common/oauth2/authorize?response_type=code&prompt=admin_consent&client_id=ae11ad05-9b02-4bb6-a906-78b7s3757f5f&scope=openid+profile&response_mode=form_post&redirect_uri=https://ExoPSapp
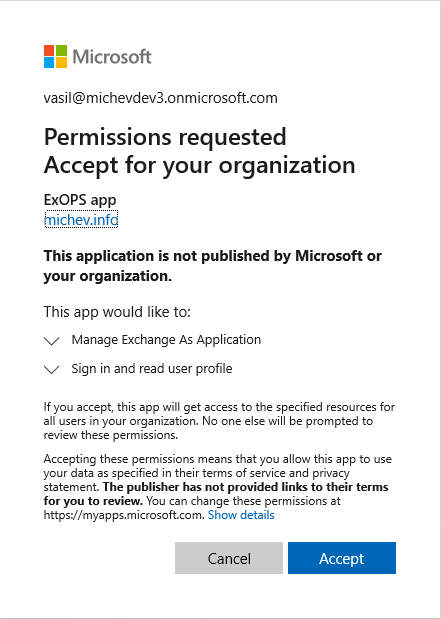
where the highlighted part corresponds to the client id of the application. At this point, an administrator from the other tenant will have to provide consent, by (carefully reviewing the information first and then) hitting the Accept button:
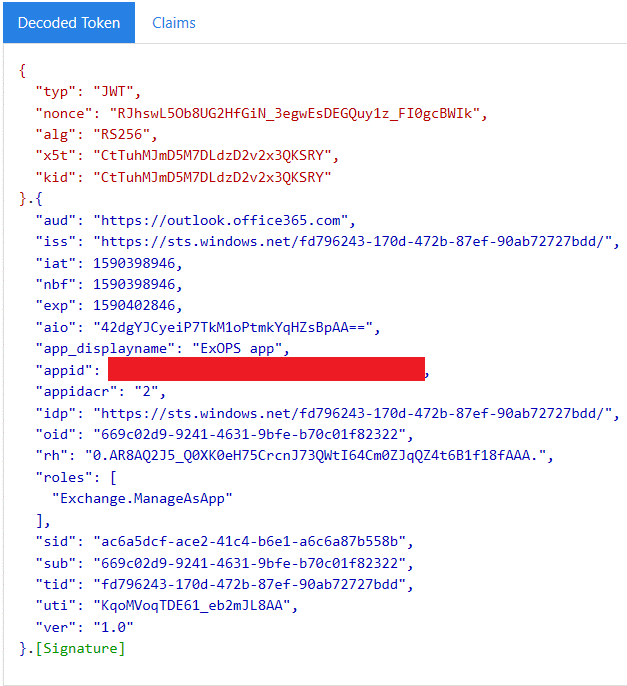
With this, the application will be added to the other tenant, and you will now be able to obtain a token for it. However, as explained in the this article, in order to make PowerShell actually connect to the Exchange Online endpoint, you need some additional configuration. Thus, while you can actually obtain a token at this point, it will not contain the required wids claim, as shown below:
Because you can obtain the token, you can actually try to connect to ExO PowerShell, but you will be greeted with an error like the below:
Connect-ExchangeOnline -CertificateThumbprint "1168BA5FC1CB62220E00487E9C07276EF33FF7DC" -Organization michevdev3.onmicrosoft.com -AppId "ae11ad05-9b02-4bb6-a906-78b7s3757f5f" -ShowBanner:$false
New-ExoPSSession : Connecting to remote server outlook.office365.com failed with the following error message : ǫ For more information, see the about_Remote_Troubleshooting Help topic.
At C:\Program Files\WindowsPowerShell\Modules\ExchangeOnlineManagement\0.4578.1\ExchangeOnlineManagementBeta.psm1:484 char:30
+ ... PSSession = New-ExoPSSession -ExchangeEnvironmentName $ExchangeEnviro ...
+ ~~~~~~~~~~~~~~~~~~~~~~~~~~~~~~~~~~~~~~~~~~~~~~~~~~~~~~~~~
+ CategoryInfo : ResourceUnavailable: (:) [New-ExoPSSession], PSRemotingTransportException
+ FullyQualifiedErrorId : System.Management.Automation.Remoting.PSRemotingDataStructureException,Microsoft.Exchange.Management.ExoPowershellSnapin.NewExoPSSession
The above might seem like a useless detail, but it serves to illustrate all the needed configuration steps as well as some basic troubleshooting.
Anyway, ignoring the above details and remembering that one of the requirements was to add an admin role to the service principal associated with our Azure AD app, we can navigate to the Roles and administrators page and add the required role. For example, we can add the Global admin role, although in a real-life situation you’d probably want to use something more restrictive:
Note that this needs to be performed in the customer tenant, and for each tenant your application will need access to!
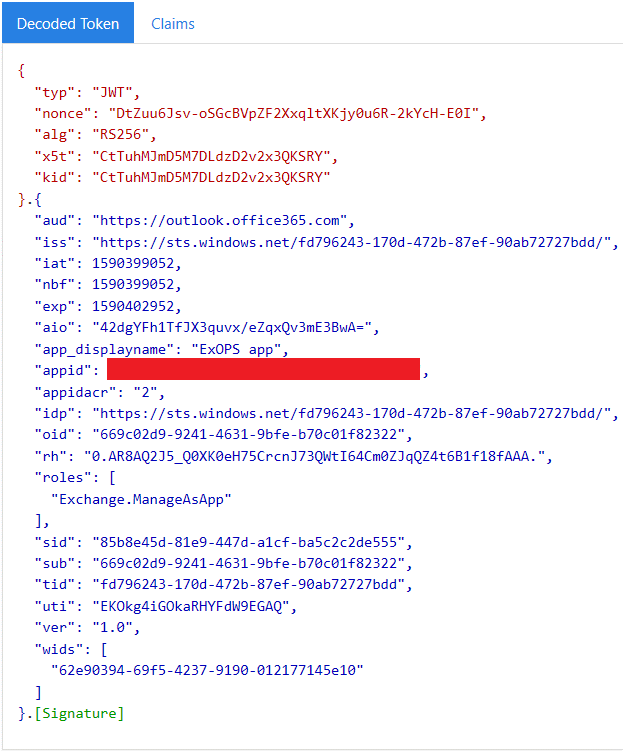
Now, after a suitable role has been added, we can request an access token and validate that the wids claim is present:
At this point, we should be able to execute the Connect-ExchangeOnline cmdlet and connect just fine (make sure to provide the customer’s tenant default domain for the –Organization parameter value!):
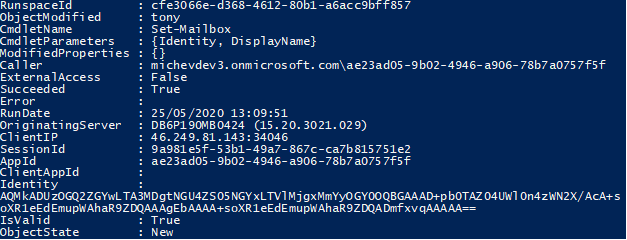
And that’s pretty much all there is to it! Of course, you’d probably want to add some additional checks and error handling to the code. On customer’s side of this, it’s also a good idea to confirm that any changes made by the application are diligently audited, which you can do via the Search-AdminAuditLog cmdlet or the EAC:
Have fun!


