Microsoft has recently pushed an update to the Connectors GUI in Exchange Online. It now uses a wizard-like interface which guides you through every step of the process and provides additional information along the way. It will also validate the settings before allowing you to save the connector (you can still save if the validation fails).
Lets take a quick look at the new process. To access the connector settings, navigate to the EAC -> Mail flow -> Connectors. On top, you will be greeted by some additional help text explaining the need of connectors and link to a small table summarizing their use. To create a new connector, press the “+” button. You will be presented with the dialog below:
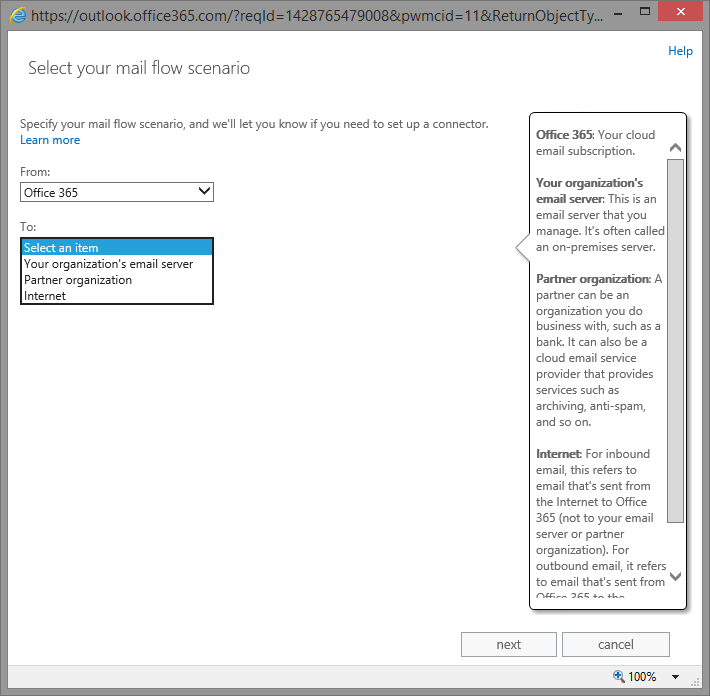
Note what the title says! It asks you to identify your mail flow scenario, and based on the choices you make, will inform you whether creating a new connector is mandatory, optional or not needed at all. In this case, I have selected to create an Outbound connector to on-prem server, and as soon as I have selected the “From” field, the “To” options have been adjusted accordingly.
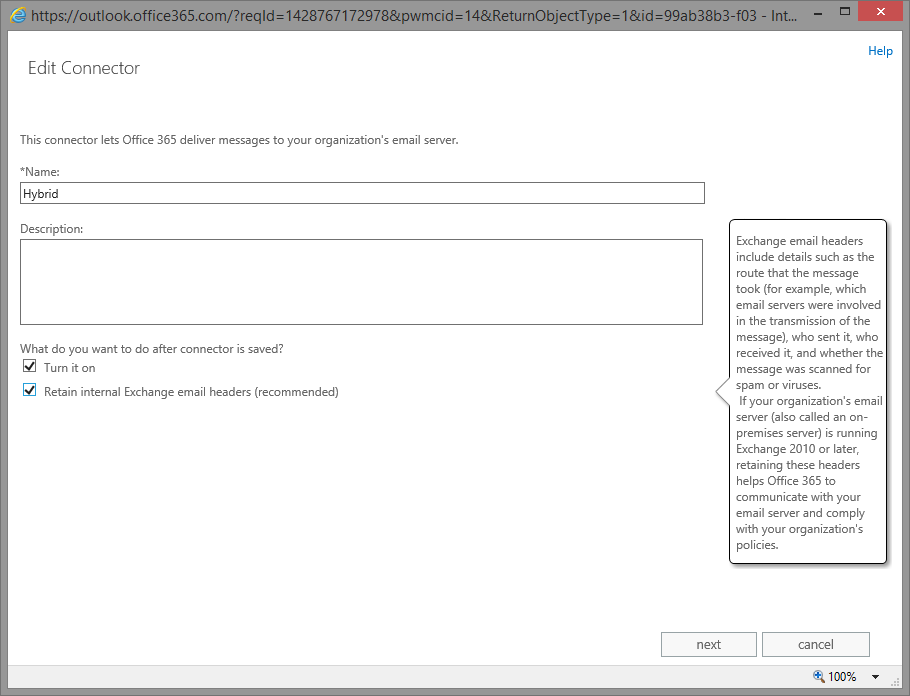
On the next page, you will be presented with the option to name the connector, enter a description, turn it on after the creation and depending on the choices you made on the previous page, additional checkbox to “Retain internal Exchange email headers” (the “CloudServicesMailEnabled” parameter). Here’s how the page looks:
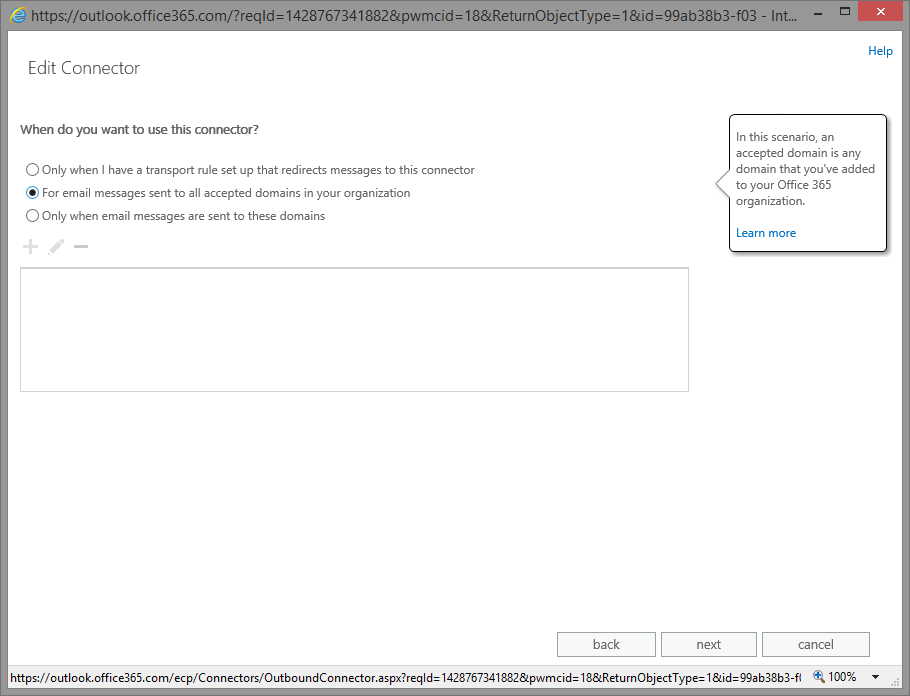
The next page will present the scoping options. The number of available options will again depend on the type of connector you are creating. The “All accepted domains” option will be missing in the case of partner-type connector. Since I have chosen the internal/hybrid type, I have the following three options:
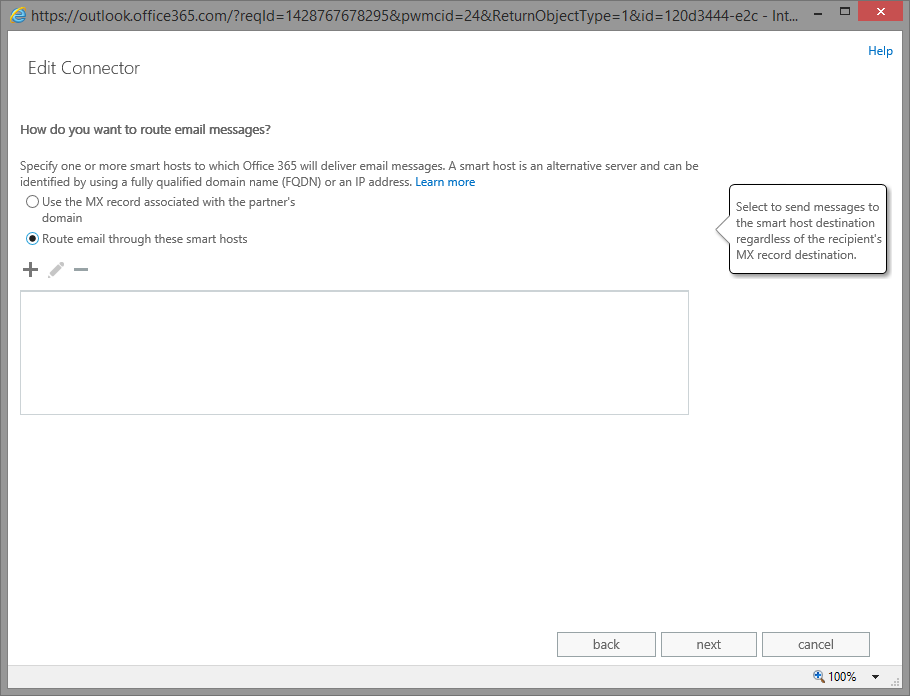
Delivery options are configured on the next page. You can either use the MX or a smart host, with the first option not available for internal connectors. To make things a bit more confusing, the screenshot I am including is showing all available options 🙂
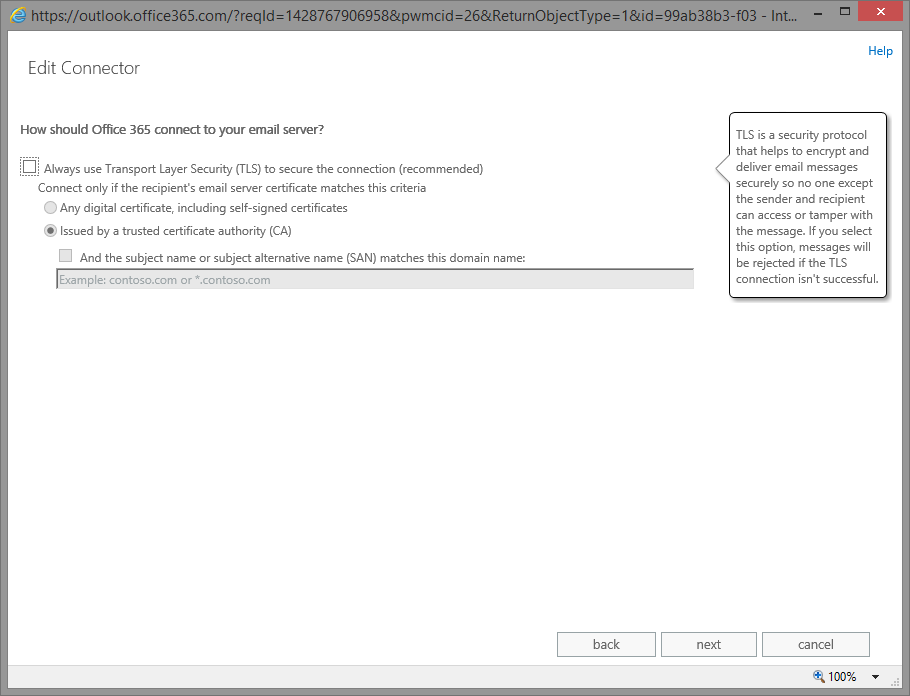
The next page allows you to configure the security settings. You can choose whether to use Opportunistic or Strict TLS, and if you really want to beef up the security, to enforce additional checks on the TLS certificate for the partner organization.
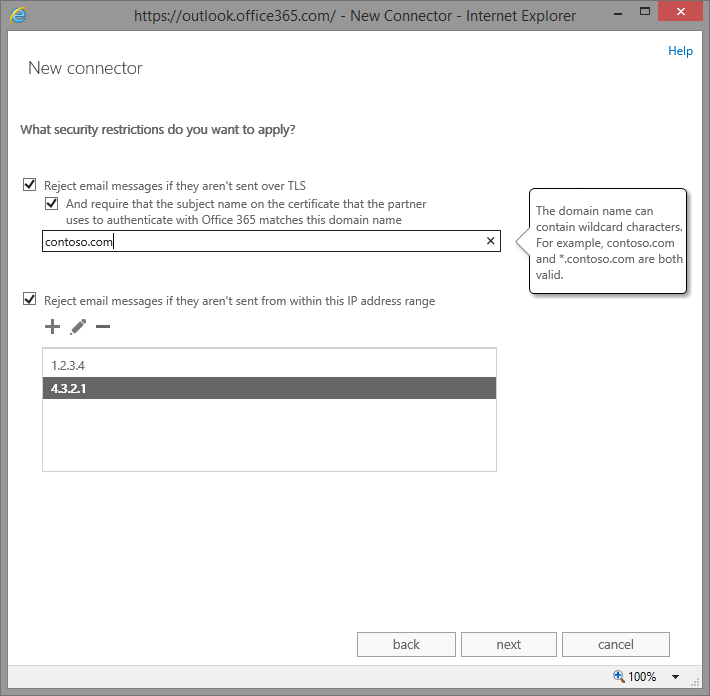
The same page for Inbound connectors is even more interesting – it allows you to combine restrictions based on both the TLS certificate and IP address information, so you can get very granular. The settings are explained in more details in this TechNet article.
Continuing to the next page, you will be presented with a summary of the options you just selected. An interesting bit is that depending on your choices, the wizard might advise you that connector simply might not be needed in this scenario. For example, if you choose not to enforce any TLS or IP based restrictions for a partner connector. Pressing the Next button here will take you to the Validation page. Here, you will need to provide an email address located in the other mail system, which will be used to verify if the connector works as expected. The verification process includes checks on DNS resolution for any FQDNs, connectivity tests, opening an SMTP and/or TLS session, etc. If any of these steps fails, you will be informed accordingly and presented with links to some helpful articles. Regardless of whether the validation passes or no, you will be able to review the details and to choose whether to save this connector or not.
Overall, while the new process might take some additional time to complete and can even feel annoying to some, it offers nice improvements and will certainly be of more use to unexperienced users. Microsoft has looked over the most common mistakes made when configuring connectors and put some warnings in place, which should help reduce the number of issues related to connectors and from their perspective, the number of service calls received. The validation alone will surely minimize the number of times you mess up the mail flow because of a stupid typo. At the same time, they do realize that in some cases you will want to create the connector before the other side is configured accordingly, thus they are allowing you to save the connector even if the validation fails. And there is always PowerShell, if you find the new GUI too annoying.