UPDATE: apparently, there *is* documentation published already, so take make sure to take a look at it (much better than my blogging attempts :)): https://technet.microsoft.com/library/mt147718(v=exchg.150).aspx
People that have worked with Office 365 for a while are probably familiar with the report scheduling feature FOPE had, and this feature has finally arrived to EOP! Granted, with EOP we can easily automate retrieving those reports via running PowerShell scripts or using the Reporting web service API, but having the feature directly available is also nice. So here’s a quick spin of the new functionality.
First of all, lets focus on the PowerShell side of things. We have 5 new PowerShell cmdlets available via Exchange Remote PowerShell, namely:
PS C:\> Get-Command *sched* -Module tmp_jyjkm0zb.ufq
CommandType     Name                                               ModuleName
-----------     ----                                               ----------
Function        Get-ReportSchedule                                 tmp_jyjkm0zb.ufq
Function        Get-ReportScheduleList                             tmp_jyjkm0zb.ufq
Function        New-ReportSchedule                                 tmp_jyjkm0zb.ufq
Function        Remove-ReportSchedule                              tmp_jyjkm0zb.ufq
Function        Set-ReportSchedule                                 tmp_jyjkm0zb.ufq
To create a new report schedule, one will use the New-ReportSchedule cmdlet. You will need to provide few mandatory parameters: Name, Type of the report (MailTraffic, SpamDetections, DLP, Rule), Report frequency (Once, Daily, Weekly, Monthly), Notification email address, Directionality of the report (Inbound, Outbound or both), and an Expiry date. In addition, you can specify a sender or recipient address on which you can filter the results, and correspondingly an ID for a DLP or Transport rule to filter on. It also allows you to change the Locale of the report, which should be handy for people that do not prefer English. Here’s an example cmdlet that will schedule a weekly Mail Traffic report to be sent to user@domain.com, and will expire in a week or so:
PS C:\> New-ReportSchedule -ScheduleName blabla -ReportType MailTraffic -ReportFrequency Weekly -NotificationEmail user@domain.com -Direction All -ExpiryDate "30 May 2015"
To get the details about an already scheduled report, you will use the Get-ReportSchedule cmdlet, and to list all scheduled reports you will use Get-ReportScheduleList. The Set-ReportSchedule and Remove-ReportSchedule cmdlets are used to edit or remove an already scheduled report correspondingly.
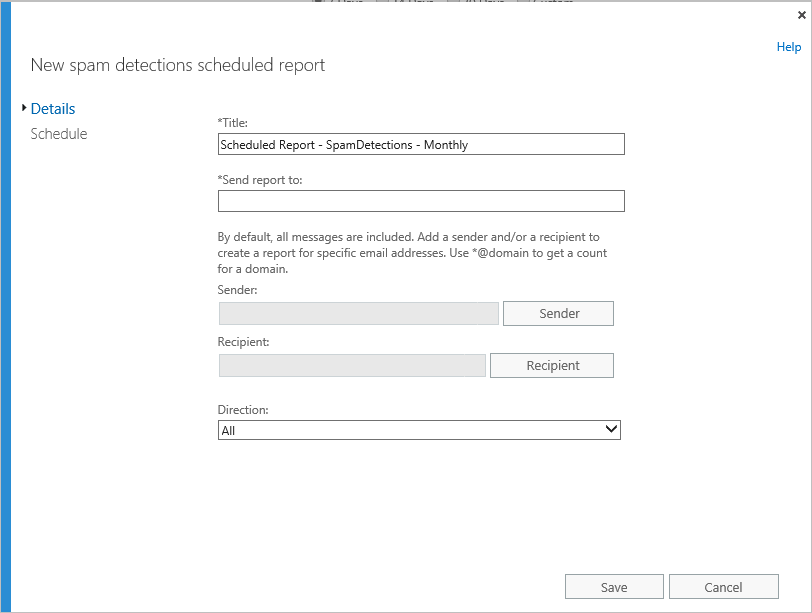
And here is how the corresponding UI controls look like. You will need to browse to the Office 365 Admin Center and open the Reports section. Select the report in question, for example the Spam Detections one. On the right hand side, you will see the links to Schedule this report or View Scheduled reports:
So, lets schedule it! A new dialog will pop up, showing all the available settings. Most of the fields will be prepopulated for you, so you can just fill in the notification address and get it over with, or change settings as needed. Depending on the type of report you have selected, some additional fields might be available (such as Rule ID). Really easy to use!
And here’s how the “View Scheduled reports” dialog looks like:
Double-clicking on a scheduled report or selecting the edit button will bring the dialog from the above screenshots. As will the New button for that matter. The Delete and Refresh button do the corresponding actions.
There are few things I haven’t figured out yet, or simply seem to be unavailable. There doesn’t seem to be any way to ‘force’ a report to run, or to check what date it is scheduled to run next. Scheduling a ‘run once’ report via the UI also doesn’t seem possible, and editing one that is configured with such setting will display ‘Monthly’ under the frequency field. In any case, the functionality is handy and relly easy to use. I would love to have it expanded to other types of reports, possibly to cover all the Office 365 workloads and every type of report we have available.


