Few weeks ago, Microsoft rolled out an update to the User Interface (UI) used for the Content search and eDiscovery functionalities as part of the Security and Compliance Center in Office 365. While in general the workflow for either Content Searches or eDiscovery cases remains largely unchanged, there are some differences and newly added controls, which we will go over in this article.
Creating a new Content Search
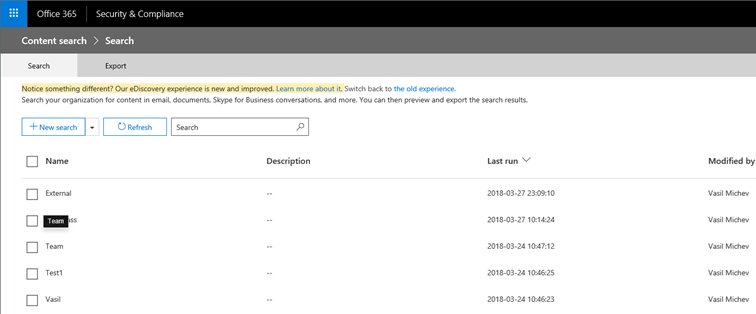
The first thing you will notice when navigating to the Content Search section in the SCC is that the UI now opens in a new browser tab. Here’s how it will look like:
The page is available directly via https://protection.office.com/?ContentOnly=1#/contentsearchbeta, and yes, “beta” is clearly visible in the URI, even though the changes are now GA. For a limited time, you will be able to switch to the old UI, by clicking the “Switch back to the old experience” link on top.
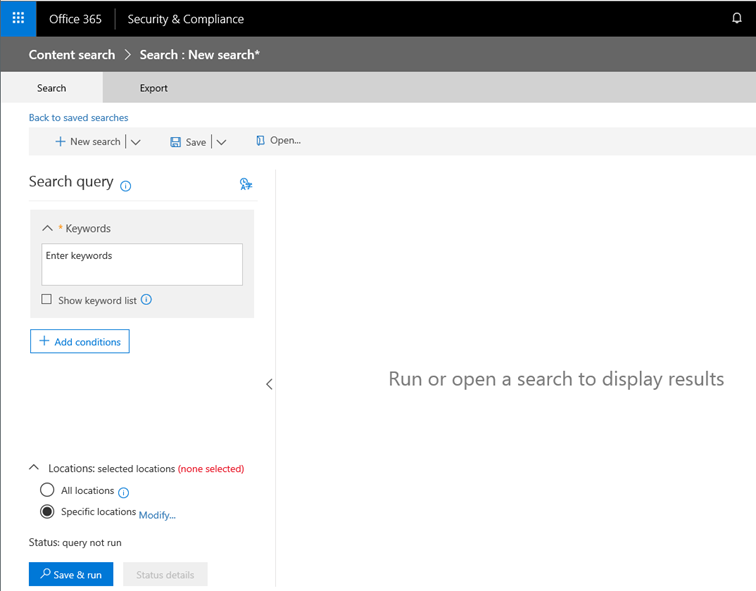
To create a new Content Search, press the New Search button on the left. In addition, the dropdown menu allows you to create a new Content search using a CSV file or via the “Guided search” wizard. We will cover these in more details later.
Unlike the old UI, which heavily relied on popup windows, all the UI controls are now presented in the same page. The left-hand side is dedicated to the Content search properties, while the bulk of the screen is preserved for displaying the Preview of any results found. Of course, for newly-created searches, the results pane will be empty until you actually run the search. The UI also features many contractible elements, allowing you to hide/show specific controls by pressing the corresponding arrows next to them.
To complete the Content search creation process, specify the Search query keywords, if any are needed. You can enter then one at a time in the corresponding textbox, or use the Show keyword list checkbox to switch to the listbox control instead, where you can paste multiple keywords/phrases. All of these will be joined together in a logical OR configuration. In case you are editing an existing query, the following warning text will appear on top of the Search query control: “Query was updated since last run. Run it again to get matching results.“
As with the old UI, you can also Add Conditions to the search query by pressing the corresponding button. Conditions are used to refine the search results and thus they are applied to the Search query in a logical AND configuration. Pressing the button will bring up another pane on the right side of the screen, where you can select one or more of the 19 conditions currently supported. An improvement compared to the old UI is the fact that conditions such as “Author equals any of” will take advantage of the picker controls, meaning that you don’t have to type user’s addresses anymore but select the directly from the menu.
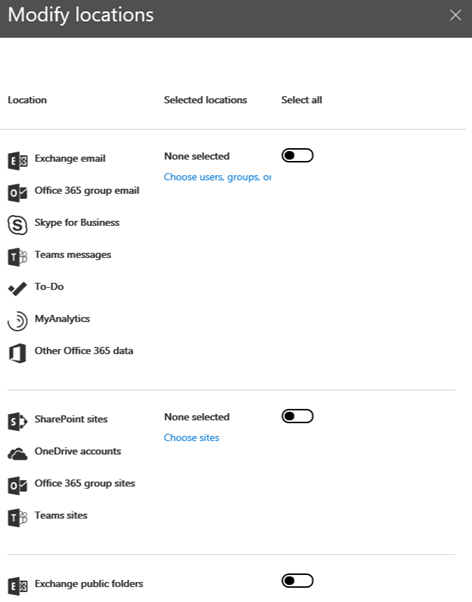
Once you are done with the search query, you need to also specify which Locations to be searched. You can either select “All locations”, or go granular and select one or more across all supported types via the picker control depicted below. In case you are working with Content search part of an eDiscovery case, you will also be presented with the option to select “Locations on hold“, which will limit the query to all locations that are put on hold by the current case, as the name suggest.
It’s a bit disappointing that even with the new UI we are still required to type in the full URL for any SPO/ODBF/Group/Teams sites, instead of being able to select them from a list. Similarly, there is still no option to designate a user and have the content search be performed across all resources related to just this user.
That’s all there is to creating a new Content search, but for those that are new to the process, an easier approach might be to use the wizard available after you select the Guided search entry from the New Search dropdown menu. The wizard takes you over three steps: Name your search, Choose locations and Create query, all of which closely resemble what we described above.
The third option available is Search by ID list. This is basically a content search limited to Exchange Online items with those specific IDs, also known as targeted search. Instead of providing search query and locations, you will need to use a specially formatted CSV file. You can find more information about this type of search in this article.
Regardless of which method you used to create a Content search, the next step will be to run the search, by pressing the Save & run button. If you only want to Save it, but perhaps run it at a later stage, use the Save menu on top instead (the operation still seems to trigger a Run however). Saving the query will require you to also provide a Name for it, as well as an optional Description. One additional improvement is the option to “tag” a query with specific language, which is performed by clicking the “Query language-country/region” control visible in the top of the Search query pane.
Working with existing Content searches
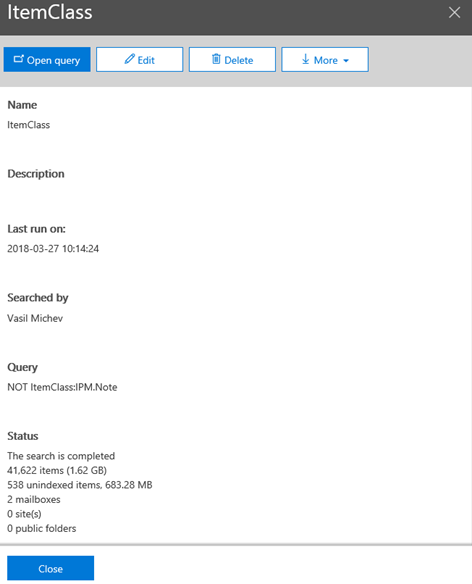
Once the Content search has been created, it will of course be populated in the list shown on the first screenshot above. In the rare occasion where this does not happen automatically, you can press the Refresh button to reload the list. Selecting a particular search from the list will bring the details pane, where you can see information about the search as well as perform some actions such as change the description (via the Edit button) or Delete the search. If you want to edit the search query or locations, you will have to use the Open query button, and follow the steps we outlined in the previous section.
Opening an existing search will populate the Preview pane with up to 200 sample entries, grouped in pages of 50 by default. If the search hasn’t run already, or the results are outdated, it will also automatically rerun the search to ensure you are looking at the latest dataset. In the top right corner, you can toggle between seeing Individual results for Preview or seeing the Search Statistics. For the latter, you will get a Summary view, or breakdown of the results based on Queries or Location. In addition, you will be able to Print or Download the summary to a CSV file. In case you do not the Preview to automatically trigger, you can adjust the behavior by selecting the corresponding option under the dropdown in the top right corner.
Apart from previewing the results, you can of course also export them, or export just the report. This is performed by pressing the More button on either the Details pane or on the top bar after opening the selected content search. Two options will be presented: Export results and Export report. The settings for either of these actions are the same as the settings available in the old UI, so in the interest of time we will not be covering them in detail. In case you want to get additional information on the export settings and limitations, check the following article.
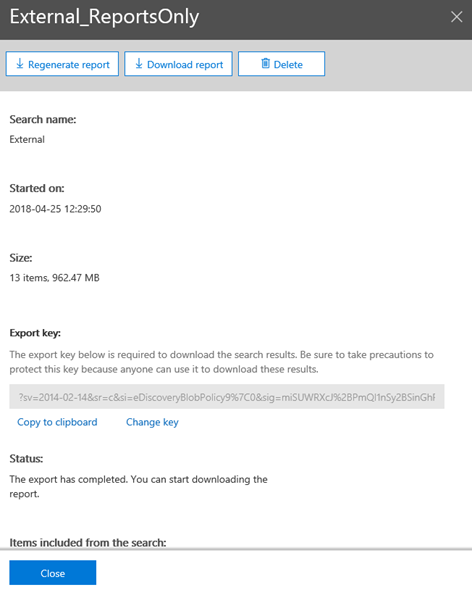
Pressing the Export button will queue the corresponding action and create a new item under the Export tab, where you can also find all previously run exports. Selecting individual items from this list will again bring the Export details pane on the right, giving you a progress indicator and a summary of the settings you configured for the Export operation. Here you will also find the option to Restart the export operation, Download the results by using the corresponding Export key or to Delete the export. If the export is outdated, you will be presented with an option to Regenerate/Restart it instead.
The new UI exposes few additional actions when you bulk select content searches, such as being able to Delete selected searches, Edit locations, Edit conditions and view the Search Statistics. No bulk actions are available on the Export tab.
Working with eDiscovery cases
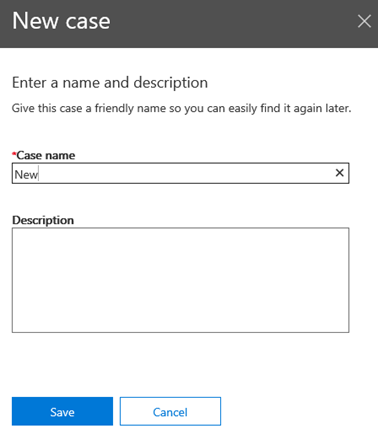
The eDiscovery cases UI has also been revamped with the new look and feel, so all the points discussed in the above sections apply. So does the general principle on the new UI – using the panes instead of popup windows. Thus, when you press the Create a case button to create a new eDiscovery case, the following pane will appear instead of a popup:
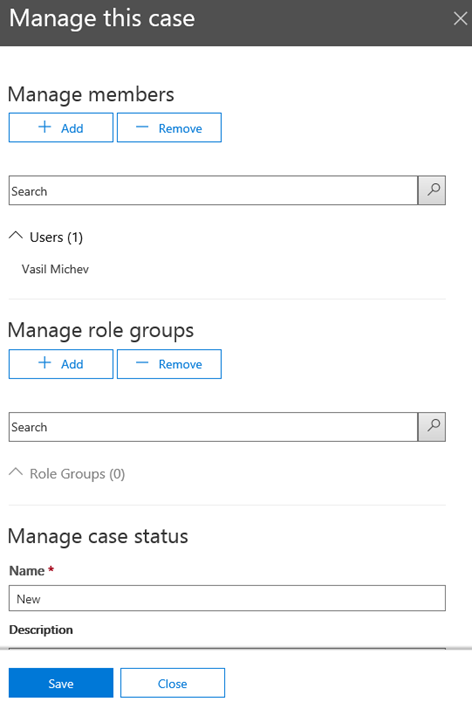
Name is the only mandatory attribute here, so creating the case takes just a second, after which the new case will be populated in the eDiscovery case list. Case-specific actions are performed after selecting the case from the list. If you want to manage the general case properties, such as Name, Description, Members and Role Groups assigned to the case, you can do so directly in the Manage this case pane on the right-hand side:
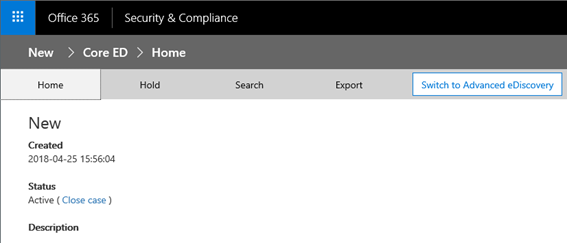
Any configuration related to putting content on hold, performing searches or exporting data is done in the “Core ED” UI, which looks very similar to the Content Searches UI we discussed in the previous sections. To access it, select a case and press the Open button next to its name. The “Core ED” UI has four tabs, as depicted on the screenshot below:
The Home tab gives a quick summary of the case, with the option to Close or Reopen it if needed. On the Hold tab, you can Create one or more holds in order to preserve content relevant to the case, or Edit or Delete existing holds. To get detailed information about managing Holds in a case, check the documentation here.
The Search tab includes the same controls we discussed in the previous sections. When working with eDiscovery cases, some additional actions are possible however. One such example is the option to Search all locations on hold, which scopes the Search to just the locations put on hold as part of the case. Another difference is the option to bulk-export searches results/reports as detailed here. Lastly, the option to Prepare for Advanced eDiscovery will be visible as action when selecting any of the Content Searches associated with the case. This functionality requires that the organization has E5 licenses. Additional details are available here.
Lastly, the Export tab will feature the same UI as described in the previous section. If you have an E5 license, an additional button will be present on top, allowing you to Switch to Advanced eDiscovery.
